
 Bookmark
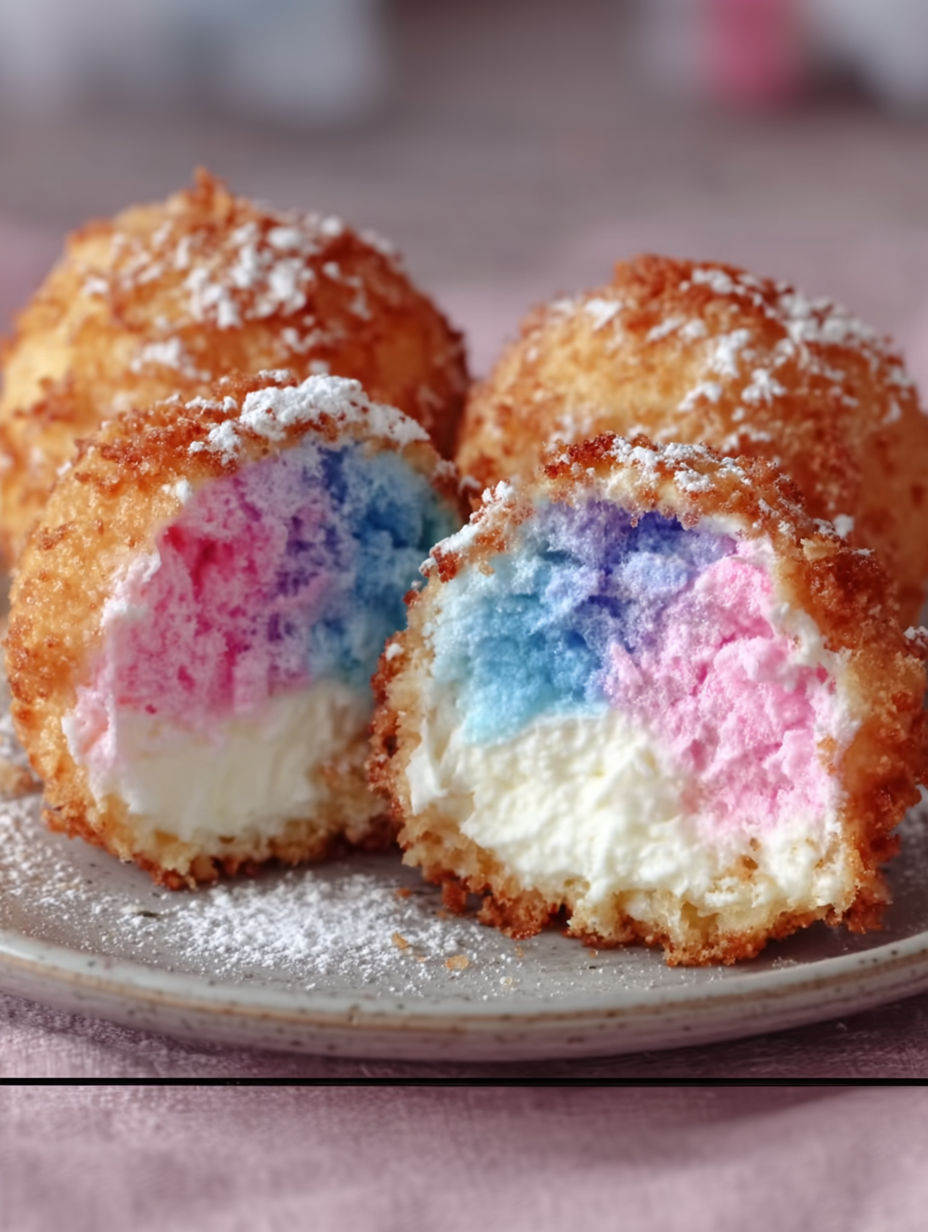
These Crispy Cotton Candy Cheesecake Bombs are playful bites filled with creamy and airy cotton candy-flavored cheesecake, wrapped in flaky biscuit dough, then fried until golden and crisp. Each warm morsel is coated in sparkling sugar with a delicate dusting of pastel powdered sugar, capturing the joyful spirit of a carnival in every mouthful. They make the perfect whimsical treat for celebrations or any time you want to bring a bit of magic to dessert.
I first made these for my niece’s birthday and the kitchen quickly turned into a sugar-filled dance party. Everyone was enchanted by the surprise of pink fluff inside these little golden bombs and asked for seconds by the end of the night.
Ingredients
- Cream cheese: creates the silky creamy base, be sure it is fully softened to avoid lumps
- Powdered sugar: adds smooth sweetness, sift it well to keep the filling silky
- Vanilla extract: brings depth to the flavor, choose pure vanilla for the best aroma
- Cotton candy flavoring: delivers the nostalgic carnival twist, clear extracts give a vibrant color
- Whipped topping: contributes light fluffiness, real whipped cream gives the richest texture
- Heavy cream: thins the filling just right, fresh cream boosts decadence
- Biscuit dough: forms the flaky crispy shell, flaky dough works best for lovely layers
- Flour for dusting: prevents sticking when shaping the dough rounds
- Vegetable oil: ideal for frying because of its neutral taste and high smoke point, always use fresh oil for clean flavor
- Granulated sugar: coats the fried bombs providing a sweet sparkle
- Cotton candy and powdered sugar: used for the final dusting, pastel shades add whimsical charm
Instructions
- Prepare the Filling:
- Beat cream cheese in a mixing bowl with an electric mixer until completely smooth. This typically takes about three minutes and ensures there are no lumps for a silky filling. Slowly beat in powdered sugar, vanilla, and cotton candy flavoring. Scrape down the sides often to mix everything well. Gently fold in whipped topping and heavy cream, taking care to maintain the airy texture. Cover and chill the filling for at least thirty minutes to let it firm, which will help with shaping.
- Shape the Dough:
- Lightly dust your work surface with flour to keep the dough from sticking. Take each biscuit dough round and gently flatten it to about one eighth inch thickness. Press from the center outward while turning the dough so you get a thin even circle. If the dough snaps back a little let it rest for a minute before continuing.
- Fill and Seal:
- Scoop one to two tablespoons of chilled filling and roll into a small ball. Place this ball in the center of the dough circle. Gather the edges carefully and pinch firmly to seal. It is important that no filling escapes. Roll the sealed dough between your palms to create a smooth neat ball.
- Heat the Oil:
- Pour four cups of vegetable oil into a heavy deep pot such as a Dutch oven. Heat over medium and use a thermometer to bring the oil to three hundred fifty degrees Fahrenheit. Test the readiness of the oil by dropping in a small piece of dough; it should sizzle and float within two or three seconds.
- Fry the Bombs:
- Lower three or four bombs into the hot oil carefully using a slotted spoon. Leave space between them so they cook evenly. Fry each side for one to two minutes, turning gently when the bottom is golden. They are done when deeply golden brown with a crisp surface. Remove with tongs and drain on paper towels.
- Coat in Sugar:
- While still warm toss the bombs in granulated sugar. If you want an extra cotton candy burst add a little cotton candy flavoring to the sugar before coating. Each piece should have a thick sparkling coat.
- Finish and Serve:
- Arrange the bombs on a plate. Sift powdered sugar over the top for a soft pastel dusting. Crown each with a small tuft of fresh cotton candy. Serve immediately for a gooey warm center or let cool slightly to enjoy a firmer bite.

My favorite moment with these bombs is peeling back the crispy shell and seeing the soft blue and pink filling stretch like a magical cloud. It's become a silly kitchen tradition in my family to argue over who gets the biggest cotton candy burst right in the center, making the experience as much about joy as the flavor.
Storage Tips
For best crispiness enjoy these treats as soon as they are fried. If you have any leftovers store them in an airtight container in the fridge for up to two days. Reheat in a hot oven at four hundred degrees Fahrenheit for five to seven minutes to restore their crunch. Add cotton candy only right before serving as it melts quickly on contact with moisture.
Ingredient Substitutions
If cotton candy flavoring is unavailable try marshmallow or strawberry extract for a fun alternative. Cream cheese can be replaced with mascarpone for a richer and silkier filling. If you cannot find biscuit dough try crescent roll dough cut into circles though the texture will be softer.
Serving Suggestions
Serve the bombs on a pretty platter dusted with powdered sugar and surrounded by mini cones of cotton candy for the full carnival vibe. Drizzling raspberry or chocolate sauce over them adds a delicious visual impression. Kids especially love helping dust and garnish these treats.
These crispy cotton candy cheesecake bombs are best served fresh and make a whimsical, showstopping dessert for any celebration.
Common Recipe Questions
- → Can I use homemade biscuit dough?
Yes, homemade biscuit dough works well if rolled thin and sealed properly to prevent leaks during frying.
- → What kind of oil is best for frying?
Neutral oils like vegetable or canola with high smoke points work best to preserve the flavors and achieve a crisp crust.
- → How should I store leftovers?
Keep cooled bites in an airtight container at room temperature for a day or refrigerated up to three days. Reheat in a hot oven to restore crispness.
- → Can I omit the cotton candy flavor?
Yes, you can skip or replace it with flavors like marshmallow or strawberry extract for a different twist, but it’s key for the signature taste.
- → How can I prevent filling leaks during frying?
Ensure the dough edges are pinched firmly and the filling is chilled before frying to keep it sealed and prevent oozing.
- → Is baking an option instead of frying?
Baking is possible but results in a less crispy texture. Brush with butter and bake at 400°F until golden for a lighter alternative.